Project Development
- Mabelle Chan
- Feb 25, 2024
- 7 min read
Updated: Feb 25, 2024
Hi readers, welcome back to my final blog of this module!! It's been a crazy semester and it is finally coming to an end!! For this final blog, I will be talking about the process my teammates and I went through to make this project a success!!
OUR TEAM CHEMICAL DEVICE
In this section, I will briefly describe my team's chemical devices, BREWSTARS! My team chose this tea maker as our chemical device! You may be wondering...what exactly makes our device special/different?
Well, our device is built to cater to the needs of adults and the elderly with musculoskeletal conditions, such as arthritis, tendonitis, etc.

From the graph above, you can tell that as we age, the amount of patients recorded with Tendonitis increases rapidly! Hence, we would like to raise awareness of this issue! How? you may ask. Well, we envisioned BREWSTARS to be a device that requires minimal physical movement of heavy weight, is easy to use, and at the same time produces the best tea! All these adjustments are made in hopes of reducing the frequency of people suffering from joint and muscle pain from boiling water the old-fashioned way, having to lift the heavy kettle just for a little cup of tea! This reduces physical strain and reduces the risk of injuries as well. Below is the 2D hand sketch of our chemical device.

TEAM PLANNING, ALLOCATION AND EXECUTION Below, are my dearest team members! Our communication and team work brought success to this project!

Without further ado, let me introduce my teammates!
Firstly, we have our CEO, Jing Yue (our leader and basically boss),
followed by our CFO, Yu Jie (the money handler), and then there's the COO, me (to oversee our team) and lastly, we have our CSO, Dhasna (our safety man)
BOM(Bill Of Materials) Here is the BOM, mostly done up by Yu Jie. This was our final spending upon the completion of this project... I'm pretty sure we initially thought we only needed less than $50...

Gannt Chart Here is the Gannt chart we came up with, where the yellow highlights are what we planned and the grey highlights are when we completed the tasks.

DESIGN AND BUILDING PROCESS
Part 1. Design and Build of the Impeller and the gear connected to the impeller was done by me.
I started by researching YouTube videos to help me get a gauge on how to create an impeller on Fusion360! Here is the link to the video I found most useful: https://youtu.be/YgnBe6HFiKI?si=DQDgnCkUxfabKV0_
First, I created a base! This part was easy, I just had to create 2 circles and extrude them according to our designed dimensions. Large Circle (Impeller Diameter): 35mm Small Circle (Impeller stick Diameter): 6mm

Next, I extruded the smaller circle to the desired height of each impeller vane. Height: 10mm

After that, I sketched out two arc lines as shown below, and duplicated them around the circle 4 times! This created the vanes of the impeller.

Now, I extrude these vanes to the same height as the small circle!

After this, I discussed the design with Jing Yue and we decided to remove the base piece!

I then added on the main stick that will connect the impeller to the small gear! Height: 13mm

Finally, after all that, we put it to print! Here are some photos of the outcomes!!


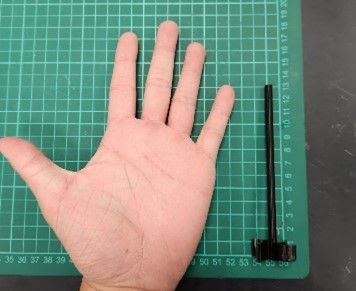
Here's a photo of it with Jing Yues hands as reference.
Moving on.... I'll now be showing you my process of making the small gear!
First, I discussed with my teammate Dhasna to finalize which video I would be referencing to not come up with different gear patterns! Here is the video link: https://youtu.be/B8A_11o7QZ0?si=aOuDTwgHaMybdCBq
On Fusion 360, I first went to utilities -> add-ins -> first Spur Gear option -> Run
Then I clicked Ok to get my gear! As simple as that!

After this, it was just standard procedure! Upload to Cura...3D print... and....

This was what our first print really looked like... I'm not sure what went wrong with the process but something definitely did...
However, don't worry because the second tries the charm for us!

Look at that cute little black gear! :D
Part 2. The Design and Build of the main Gears were done by Dhasna.
Link to her documentation: https://dhasna22.wixsite.com/blog/post/blog-5-project-development
Here are some videos I took when I was overseeing her gears print!
Part 3. Design and Build of the gear container was done by Jing Yue.
Link to his documentation: https://jingyue22.wixsite.com/jing-yue-life-in-cpd/post/blog-5-prototyping
Part 4. Programming of the motor and LCD was done by Me, Yu Jie and Jingyue.
Link to Yu Jie's documentation: https://linyujie2005.wixsite.com/my-site/post/blog-6
Here are some photos of us hard at work...

In this part, I contributed to the last part. Where I refined the final code so that the motor could be controlled by the temperature!
Here is the improved code with reference to Jing Yue's original code:
#include <OneWire.h>
#include <DallasTemperature.h>
#include <Servo.h>

#define ONE_WIRE_BUS 9

OneWire oneWire(ONE_WIRE_BUS);

DallasTemperature sensors(&oneWire);

float Celsius = 0;
Servo myservo;
const int Ledpin = 9; // Changed Ledpin to const int
int temperature = 0;
int pos = 0;

// Define minTemp as a global variable
float minTemp = 20; // Corrected minTemp threshold

void setup() {
  sensors.begin();
  myservo.attach(9); // Attached servo to pin 9
  pinMode(Ledpin, OUTPUT); // Initialize LED pin
  Serial.begin(9600);
}

void loop() {
  sensors.requestTemperatures();

  Celsius = sensors.getTempCByIndex(0);

  Serial.print(Celsius);
  Serial.println("C");

  // Control servo motor based on temperature
  if (Celsius <= 20 && Celsius != -127) { // Changed to use minTemp variable
    for (pos = 0; pos <= 180; pos += 1) { // goes from 0 degrees to 180 degrees
      myservo.write(pos); // tell servo to go to position in variable 'pos'
      delay(15);
    }
    for (pos = 180; pos >= 0; pos -= 1) { // goes from 180 degrees to 0 degrees
      myservo.write(pos); // tell servo to go to position in variable 'pos'
      delay(15);
    }
  }
  else {
    // Do something else when temperature is below threshold
    // Turn off LED when temperature is below threshold
    digitalWrite(Ledpin, LOW);
  }
} |
This was also the finalised code we used and is what led us to success! LOL :)
Part 5. Integration of all parts and electronics was done by everyone
Embeded finalized fusion 360 design files: Impeller:
Mini Gear:
Documentation for System integration!


FINALLY, the part you've all long-awaited (I Hope) Here's the video of our final product BREWSTARS!
Hope you guys found that...
PROBLEMS AND SOLUTIONS
In this section I will describe some problems we encountered in the design and build process and how the team solved them!
Problem 1: The main gears had a base, small gear did not. Hence imbalanced gears create problems when gears spin.

Solution: Add modifications, which in this case, is an additional layer of thick paper on the small gear. Problem 2: Finding the right pressure angle according to the number of teeths.

Solution: We found a method to calculate this value Problem 3: Dimensions after laser cutting had some odd fittings and did not allow the box to fit well on the sides.

Solution: We moved the breadth pieces onto the base plate and the length pieces the the outer sides of the base plate.
Problem 4: Water was leaking from the hole created to fit the tap.

Solution: We hot-glued the surrounding parts of the tap to ensure no water was leaking from the container. Problem 5(Arduino):
The setup was wrong which caused all our prior codes to not work
Upon fixing the code, we found more physical problems with the Arduino parts itself! - 2 ground wire ports were not working - The initial servo couldn't spin 360 degrees

Solutions:
We got help from our fellow classmate Yu Chen(Coding God)
Used Female-to-female wires and soldered to connect all necessary wires to one ground port.
Begged (Just Kidding) for a new servo.
PROJECT DESIGNS FILES (DOWNLOADABLE)
In this section, I will provide all the design files (Fusion360 files, .dxf files, .stl files, and Arduino programs files) as downloadable files!
LEARNING REFLECTION
FINALLYY it's all done! This whole project took over a month, from simply talking about what our prototype will be, to making it! It's crazy to me how ideas can become a real product. I've always just been reading or watching about people like Dyson, Elon Musk, etc. Turning their creative ideas into actual useful products, and this was my first time experiencing something like that. Not that the prototype we made came anywhere close to the things they achieved... But... It's a start! This experience taught me so many useful skills that I know I will be putting to use in the future! Some concepts I found really interesting and useful are...
The Morphological Chart
The Concept Evaluation Matrix
Gannt Chart
Arduino Programming
Soldering
I don't know about my classmates, but I felt that the Morphological Chart was so effective in narrowing down which concept/ Designs we wanted! Backing this up would be the Concept Evaluation Matrix where we really compare the importance of certain factors we want to implement in our design according to different percentages which helps us cut down to our final design concept! I think this is the best way to evaluate especially for the indecisive people out there... haha.
Next, I really want to comment on how useful the gannt chart is! Throughout this project, I find referring to the gannt chart quite a bit! It kept my team, in check and ensured that we all knew what to do and when to do it by!
Next, Arduino Programming. A few months back I did a blog about a few tasks I was given to complete, at that time I thought I knew a lot about coding.... Boy was I wrong.... When the dateline of this project was approaching, Jing Yue and Yu Jie had yet to figure out what was wrong with the code, so I decided to give it a try and added some lines that I thought were necessary. TWO hours the 3 of us stayed in the classroom and we still couldn't figure it out! It was then I realised how difficult it was to get it right... Thankfully, we found the error and it turns out there was something wrong with the setup instead! That's when we asked our classmate Yu Chen, the king of Arduino for help! He taught us some changes we needed to make to the setup and surprise surprise it worked! Without him, we really wouldn't have gotten it, like ever. Finally, after years of watching others, I got a chance to experience using the soldering iron! Here is me and Jing Yue taking turns to use it!

To end off, this experience was both fun and dreadful at the same time... I had a lot of fun working with my friends! Especially watching the time-lapse of the 3D prints haha. But that said, juggling school work and completing this project at the same time wasn't an easy task! Especially when the presentation week was also our exam week...
However, it did feel really rewarding after the presentation! and although our project wasn't 100% flawless, the effort we put in was worth a lot more!
With that, my last blog will be coming to an end, thank you, guys, for always reading and supporting my content! This may be the last ever blog I will be doing for a module, but maybe... I'll come back if I'm free to share with you guys about my journey in my Final Year Project!!
Byeeeeee


Comments